 on the Windows taskbar).
For a gain of +30 dB, a - 20 dBu maximum signal gives 0 dBFS.
For a gain of +51 dB, a - 41 dBu maximum signal gives 0 dBFS.
If you have purchased a package from us that includes a microphone or if you own a microphone you want to connect directly to the VXpocket card, follow these instructions. The battery driven microphone we sell with the software is meant to be connected directly to the VXpocket left input (channel 1). We also sell microphones that need a battery driven phantom power supply to work with this card. If you have such a phantom power device, connect the microphone to the phantom power input, then connect the phantom power output to the VXpocket left input (channel 1).
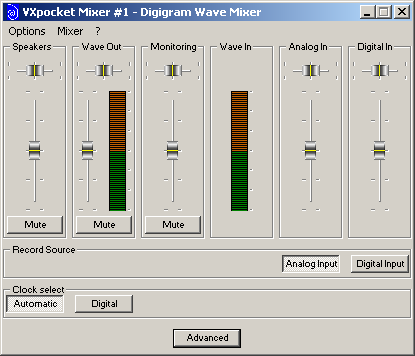
![]() Open the VXpocket mixer as shown below (consult
your VXpocket documentation on how to open the mixer, usually it can be opened
by double-clicking the blue Digigram icon on the Windows taskbar).
Open the VXpocket mixer as shown below (consult
your VXpocket documentation on how to open the mixer, usually it can be opened
by double-clicking the blue Digigram icon on the Windows taskbar).
Click the  button to open the dialog shown below.
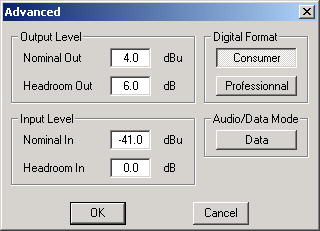
We will only modify the input level. The output level should not be changed from the default settings. The default values are shown in the figure above, the modified values are shown in the figure below.
The Nominal In value determines if the VXpocket input is line or microphone. The Nominal In is set to 4.0 dBu as default to operate as line input. If it is set in the range from -20 dBu to 41 dBu, it will operate as microphone input. This is what we want, so change the Nominal In value from 4.0 dBu to 41 dBu.
Finally set Headroom In to 0.0 dB as shown in the figure above.
Note: The input level in microphone mode will only work if the slider for channel 2 is set to minimum. In the WinMLS menu, go to Toolbars->Levels (and Mixer) to open the dialog and set the Input Ch. 2 slider to minimum. The Input Ch. 1 slider will set the level for both inputs in case you are using two inputs. In other words, channel 1 and 2 input volumes are linked in microphone mode.
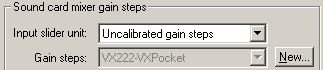
The mixer has only a few gain settings when it is set as
microphone input. These mixer gain steps can be determined, and you should do
this if you want to set different input levels while maintaining the
calibration. Go to Measurement->Calibration
, click the  button shown below to complete
the process of finding the gain steps.
button shown below to complete
the process of finding the gain steps.
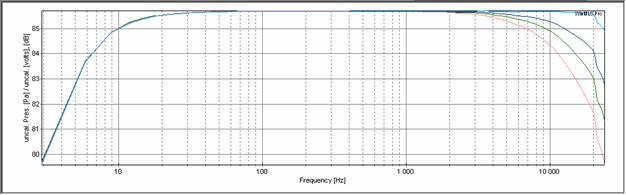
Note: Below is a plot of some gain steps. It shows that above 2 kHz, the microphone gain is not flat. The deviation between the highest gain and lowest gain is > 1 dB at 10 kHz and 4 dB at 20 kHz. This is a characteristic of the VXpocket microphone gain and Digigram explains that it is related to the small size of the sound card. So be careful if using the microphone gain steps above 5 kHz if you expect a flat frequency response when using the highest microphone gains.
Important! The calibration should always be redone after changing the VXpocket level as explained above. For more details, see the Calibration section.

 to
close the dialog.
to
close the dialog.